Starting from version 1.1 SRT Streamer PRO supports publishing via WHIP protocol (WebRTC).
This protocol is well suited for RealTime streaming task because it is based on WebRTC.
Due to the fact that the stream can be sent directly to the viewer in the browser without transcoding, ultra-low latency is achieved.
With its help it is possible to achieve glass-to-glass delay of 300ms.
Next we will tell you how to start streaming using WHIP protocol.
Step 1: get parameters for WHIP connection
To stream to a WHIP-server you need to know two parameters:
whip-endpoint - is the address of the server
whip-token - this is the token (similar to stream id)
Examples:
if you use the Dolby Millicast service, these parameters look like this
whip-endpoint : https://director.millicast.com/api/whip/myStreamName
whip-token: a6939b32fa66689a11dd4ddc817f767bdc3fdf57051fd059e56dc5f1022241f1
if you use the RustXIU media server (open-source project) , these parameters look like this
whip-token: 123
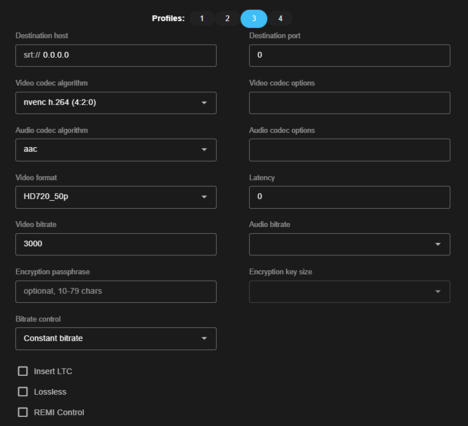
Step 2: encoding parameter setting
You can use the same profile as for SRT. But it is important to remember that WHIP streaming will use ONLY the following parameters:
Video Codec algorithm - please select only H264. You can use HW encoding such as Nvidia or Intel QuickSync.
Video Codec options (optional)
Video Format - please select only Progressive (WebRTC does not support Interlaced)
Video Bitrate
We recommend creating a separate profile in which you specify “0” in other fields. This is optional but will help to separate the WHIP profile from the SRT profile
profile N3 with "0" (optional)
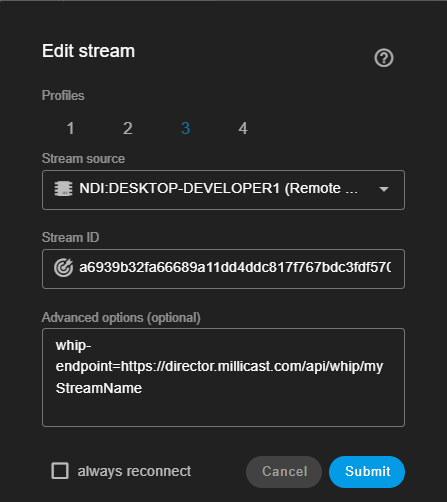
Step 3: stream configuration
Creating and editing a stream is almost the same as for an SRT stream:
- select a profile (from Step 2)
- select Stream source (SDI, NDI etc)
- in the Stream ID field enter whip-token (from Step 1)
- in the Advanced Options field enter the following line
whip-endpoint=_specify_whip-endpoint_from_Step_1_
example for Dolby.io Millicast service
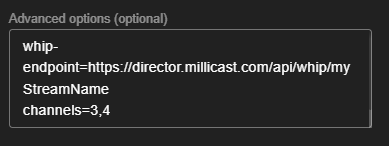
Since WebRTC supports only two audio channels, channels 1 and 2 will be used by default.
You can specify other channels if necessary through the channels parameter in the Advanced options field as shown in the image below.
This can be useful for example if the input SDI signal has multilingual audio and you need to stream for one language
same config + selected audio-channels